Writing a Simple Vim Plugin for REPL Interaction
I did not really know how Vim’s terminal API worked until I wrote a small plugin that sends code from an editing buffer to a running R session.

A lightweight Vim plugin for sending R code to a terminal REPL.
1 Introduction
I did not really know how Vim’s terminal API worked until I sat down and wrote a small plugin that sends code from an editing buffer to a running R session. The established tools for this task (Nvim-R and vim-slime) are feature-rich but complex. I wanted something minimal: select code in Vim, press a key, and see it execute in an R terminal pane.
The result is rgt-R.vim, a single-file plugin under 150 lines that handles line submission, visual selection, chunk navigation, and a handful of convenience mappings for common R inspection commands. It uses Vim’s built-in term_sendkeys() and term_list() functions, requiring no external dependencies beyond Vim 8+ with terminal support.
This post presents the complete plugin code, explains each function, documents the key mappings, and discusses the experiments that shaped the design.
More formally, this post documents the Vim-plugins layer (Layer 6) of the Workflow Construct described in post 52 from the authorship side: how a plugin is written, not which plugins to install. This is the construct’s editor-extensibility companion to post 30 (which documents specific R-plus-LaTeX plugins) and post 41 (which documents UltiSnips snippet authorship). Together the three posts give the reader the full picture of the Vim-plugins layer: which plugins to use, how to write one, and how to extend one with custom snippets.
1.1 Motivations
- Nvim-R is powerful but introduces substantial complexity for users who only need code submission; I wanted a lightweight alternative.
- vim-slime uses tmux or screen as intermediaries, adding configuration overhead that I wanted to avoid for a simple R workflow.
- Understanding Vim’s terminal API (
term_sendkeys,term_list) seemed valuable for building custom development workflows beyond R. - I teach R programming and wanted a plugin simple enough that students could read and understand the source code in a single sitting.
- I was curious whether a minimal plugin could cover 90% of my daily R interaction needs without the remaining 10% of features that add complexity.
1.2 Objectives
- Build a Vim plugin that sends individual lines, visual selections, and R Markdown chunks to a running R terminal using Vim’s built-in terminal API.
- Document each VimScript function with its purpose, mechanism, and interaction with the terminal buffer.
- Explain the autocommand group that restricts mappings to R, Rmd, and Qmd filetypes.
- Present the experiments that explored edge cases in visual selection submission and Quarto rendering.
This learning process is documented here. Errors spotted or better approaches are always welcome.

Understanding Vim’s terminal API opens the door to custom development workflows.
2 Prerequisites and Setup
To use this plugin, one will need:
- Vim 8.0 or later with
+terminalfeature (check with:echo has('terminal')) - R installed and accessible from the command line
- The plugin file placed in the Vim plugin directory (e.g.,
~/.vim/plugin/rgt-R.vim)
Background assumed: Basic Vim fluency (normal mode, visual mode, command mode) and familiarity with R. No prior VimScript experience is required; this post explains each function.
To verify terminal support:
:echo has('terminal')If this returns 1, your Vim build supports the terminal API. If it returns 0, a Vim build with terminal support must be installed (e.g., brew install vim on macOS).
3 What is a Vim REPL Plugin?
A REPL (Read-Eval-Print Loop) plugin connects a text editor to a running interpreter. Code is written in the editor, a key combination sends it to the interpreter for execution, the interpreter prints its output, and editing continues.
Vim’s terminal API provides the plumbing for this connection. The function term_list() returns a list of open terminal buffers, and term_sendkeys() sends keystrokes to a specific terminal. By combining these with Vim’s visual selection and search capabilities, a small plugin can provide a complete code-submission workflow.
Think of it as a pipe between the editor and the R session. The plugin handles the mechanics of extracting selected text and pushing it through the pipe; R handles the evaluation and output.
4 Getting Started
4.1 Launching an R Terminal
The plugin includes a mapping to open an R terminal in a vertical split. Press <localleader>r in normal mode:
nnoremap <silent> <localleader>r
  \ :vert term R --no-save<CR><c-w>:wincmd p<CR>
This opens R in a vertical terminal split and returns focus to the editing buffer. The --no-save flag prevents R from prompting to save the workspace on exit.
5 The Complete Plugin
5.1 Core Submission Functions
5.1.1 SubmitLine: Send the Current Line
function! SubmitLine()
  :let @c = getline(".") . "\n"
  :call term_sendkeys(term_list()[0], @c)
endfunction
SubmitLine copies the current line into register c, appends a newline character, and sends it to the first terminal in term_list(). The newline triggers R to evaluate the expression.
Mapping: Press <CR> (Enter) in normal mode on any R, Rmd, or Qmd file to submit the current line.
5.1.2 GetVisualSelection: Extract Selected Text
function! GetVisualSelection(mode)
  let [line_start, column_start] =
    \ getpos("'<")[1:2]
  let [line_end, column_end] =
    \ getpos("'>")[1:2]
  let lines = getline(line_start, line_end)
  if a:mode ==# 'v'
    let lines[-1] = lines[-1][
      \ : column_end -
      \ (&selection == 'inclusive' ? 1 : 2)]
    let lines[0] = lines[0][column_start - 1:]
  elseif a:mode ==# 'V'
  else
    return ''
  endif
  return join(lines, "\n")
endfunction
GetVisualSelection handles both character-wise (v) and line-wise (V) visual selections. For character-wise selection, it trims to the exact column range. For line-wise selection, it returns the full lines without modification. The function returns the selected text as a single string with newlines preserved.
5.1.3 Sel and Submit: Two-Stage Submission
function! Sel()
  :let @c = GetVisualSelection(
    \ visualmode()) . "\n"
  :call writefile(
    \ getreg('c', 1, 1), "source_visual")
endfunction

function! Submit()
  :let y = "source('source_visual',echo=T)"
    \ . "\n"
  :call term_sendkeys(term_list()[0], y)
endfunction
Visual selection submission uses a two-stage process: Sel writes the selected text to a temporary file (source_visual), and Submit tells R to source that file with echo enabled. This approach avoids the complexity of sending multi-line text directly through term_sendkeys, which can cause timing issues with long selections.
Mapping: Select code visually and press <CR> to submit the selection.
5.1.4 Brk: Interrupt R
function! Brk()
  :call term_sendkeys(
    \ term_list()[0], "\<c-c>")
endfunction
Brk sends Ctrl-C to the R terminal, interrupting any running computation. Mapped to <localleader>c.
5.3 Convenience Functions
5.3.1 Raction: Quick R Inspection
function! Raction(action)
  :let @c = expand("<cword>")
  :let @d = a:action . "(" . @c . ")\n"
  :call term_sendkeys(term_list()[0], @d)
endfunction
Raction takes an R function name as its argument, wraps the word under the cursor as its argument, and sends the call to R. This enables quick inspection mappings:
| Mapping | R Command | Purpose |
|---|---|---|
<localleader>d |
dim(x) |
Dimensions |
<localleader>h |
head(x) |
First rows |
<localleader>s |
str(x) |
Structure |
<localleader>p |
print(x) |
|
<localleader>n |
names(x) |
Column names |
<localleader>f |
length(x) |
Length |
5.3.2 SubmitEmbed and Rd: Inline Output
function! SubmitEmbed()
  :let y = "sink('temp.txt'); " .
    \ "source('source_visual',echo=T); " .
    \ "sink()" . "\n"
  :call term_sendkeys(term_list()[0], y)
endfunction

function! Rd()
  !sed 's/^/\# /g' temp.txt > temp_commented.txt
  :r !cat temp_commented.txt
endfunction
SubmitEmbed sources a visual selection while redirecting output to a file. Rd reads that output back into the editing buffer, prepending each line with # so the output appears as R comments. This is useful for embedding results directly in scripts.
Mapping: <localleader>z in visual mode.
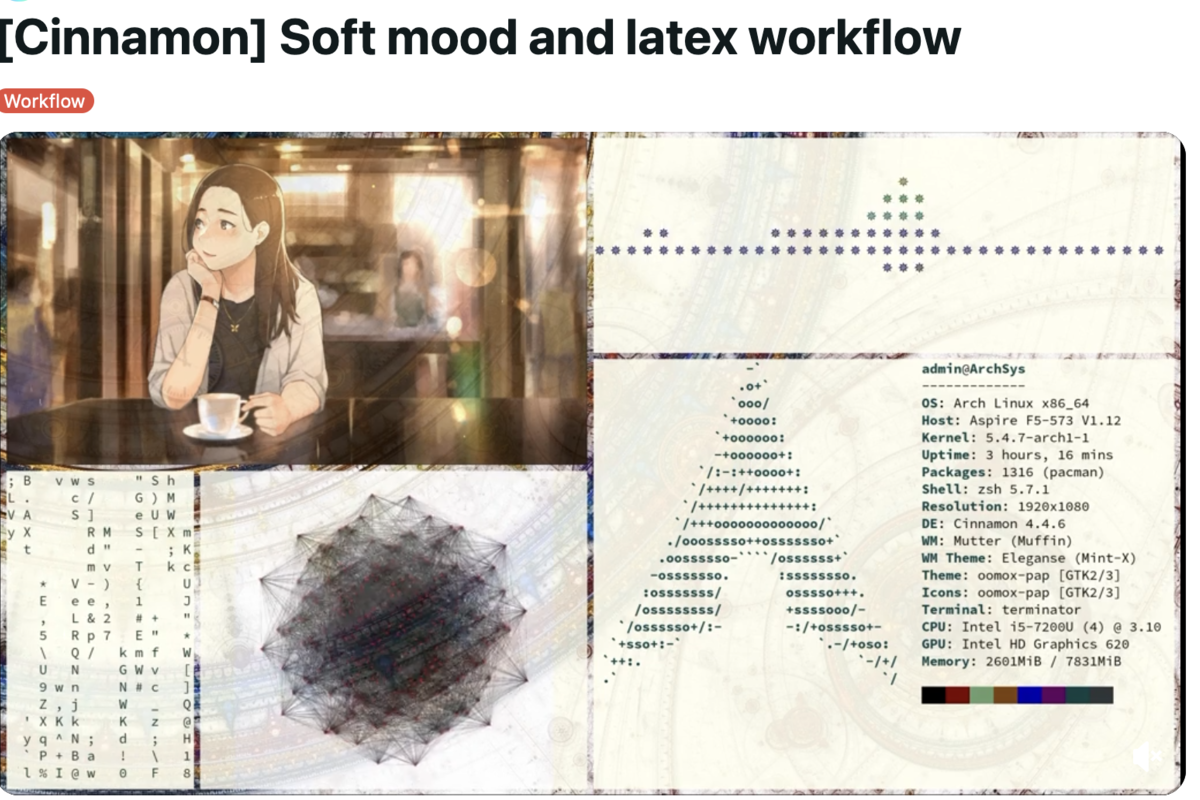
The plugin in action: code flows from the editor to the R terminal with a single keypress.
5.4 The Autocommand Group
The complete autocommand group restricts all mappings to R, Rmd, and Qmd filetypes:
augroup r_rmd_qmd
  autocmd!
  autocmd FileType r,rmd,qmd
    \ nnoremap <silent> <CR>
    \ :call SubmitLine()<CR><CR>
  autocmd FileType r,rmd,qmd
    \ vnoremap <silent> <CR>
    \ :call Sel() \|
    \ :call Submit()<CR><CR>
  autocmd FileType r,rmd,qmd
    \ nnoremap <silent> <localleader>c
    \ :call Brk()<CR><CR>
  autocmd FileType r,rmd,qmd
    \ nnoremap <silent> <localleader>l
    \ :call SelectChunk()<CR> \|
    \ :call Sel() \|
    \ :call Submit()<CR><CR>
  autocmd FileType r,rmd,qmd
    \ nnoremap <silent> <localleader>;
    \ :call SelectChunk()<CR> \|
    \ :call Sel() \|
    \ :call Submit()<CR> \|
    \ /```{<CR>j
  autocmd FileType r,rmd,qmd
    \ nnoremap <localleader>k
    \ :call MovePrevChunk()<CR>
  autocmd FileType r,rmd,qmd
    \ nnoremap <localleader>j
    \ :call MoveNextChunk()<CR>
  autocmd FileType r,rmd,qmd
    \ nnoremap <silent> <localleader>r
    \ :vert term R --no-save<CR>
    \ <c-w>:wincmd p<CR>
  autocmd FileType r,rmd,qmd
    \ nnoremap ZT :!R --quiet -e
    \ 'render("<C-r>%",
    \ output_format="pdf_document")'<CR>
  autocmd FileType r,rmd,qmd
    \ nnoremap ZY :!R --quiet -e
    \ 'quarto_render("<C-r>%",
    \ output_format="pdf")'<CR>
  autocmd FileType r,rmd,qmd
    \ tnoremap ZD
    \ quarto::quarto_render(
    \ output_format = "pdf")<CR>
  autocmd FileType r,rmd,qmd
    \ tnoremap ZO source("<C-W>"%")<CR>
  autocmd FileType r,rmd,qmd
    \ tnoremap ZR render("<C-W>"%")<CR>
  autocmd FileType r,rmd,qmd
    \ tnoremap ZS style_dir()<CR>
  autocmd FileType r,rmd,qmd
    \ tnoremap ZQ q('no')<C-\><C-n>:q!<CR>
  autocmd FileType r,rmd,qmd
    \ tnoremap ZZ q('no')<C-\><C-n>:q!<CR>
  autocmd FileType r,rmd,qmd
    \ tnoremap lf ls()<CR>
  autocmd FileType r,rmd,qmd
    \ nnoremap <localleader>d
    \ :call Raction("dim")<CR>
  autocmd FileType r,rmd,qmd
    \ nnoremap <localleader>h
    \ :call Raction("head")<CR>
  autocmd FileType r,rmd,qmd
    \ nnoremap <localleader>s
    \ :call Raction("str")<CR>
  autocmd FileType r,rmd,qmd
    \ nnoremap <localleader>p
    \ :call Raction("print")<CR>
  autocmd FileType r,rmd,qmd
    \ nnoremap <localleader>n
    \ :call Raction("names")<CR>
  autocmd FileType r,rmd,qmd
    \ nnoremap <localleader>f
    \ :call Raction("length")<CR>
  autocmd FileType r,rmd,qmd
    \ inoremap <c-l>
    \ <esc>A \|><CR><C-o>0<space><space>
  autocmd FileType r,rmd,qmd
    \ vnoremap <silent> <localleader>z
    \ :call Sel() \|
    \ :call SubmitEmbed() \|
    \ :call Rd()<CR><CR>
augroup END
The autocmd! at the top clears any previous definitions, preventing duplicate mappings when the plugin is reloaded. Each mapping is scoped to R, Rmd, and Qmd filetypes only.
6 Experiments
6.1 Experiment 1: Adding Quarto Rendering
The ZY mapping was added to support rendering Quarto documents to PDF directly from Vim:
nnoremap ZY :!R --quiet -e
  \ 'quarto_render("<C-r>%",
  \ output_format="pdf")'<CR>
The development process:
- Start by constructing the mapping in
.vimrc(easier to iterate than in the plugin file). - Use
ZT(the existing Rmd render mapping) as a template. - Replace
render()withquarto_render()and adjust the output format argument. - Test with any
index.qmdfile. - Once working, move the mapping to the plugin file with an appropriate autocommand.
6.2 Experiment 2: Visual Selection Duplication
An investigation into why Sel() was sending multiple copies of the source command to R when submitting visual selections. The number of duplicate submissions equalled the number of lines in the selection.
The root cause was that the visual-mode mapping triggered the Sel and Submit functions once per selected line rather than once for the entire selection. The fix was ensuring the mapping operated on the selection as a single unit using the \| command separator.
6.3 Things to Watch Out For
term_list()[0]assumes one terminal. If multiple terminal buffers are open, the plugin sends code to the first one, which may not be the R session. Close unused terminals or modify the plugin to target a specific buffer.- The
source_visualtemp file persists. The plugin writes a temporary file to the current directory on every visual submission. Addsource_visualto your.gitignoreto prevent accidental commits. - Long selections may cause timing issues. The two-stage approach (write to file, then source) avoids most timing problems, but very large selections may still encounter race conditions between file writing and sourcing.
<CR>remapping overrides Enter in normal mode. This is intentional for R files but may surprise those who expect Enter to move the cursor down. The mapping only applies to R, Rmd, and Qmd filetypes.

A minimal plugin teaches more about Vim’s internals than a feature-rich one.
6.4 Lessons Learnt
6.4.1 Conceptual Understanding
- Vim’s terminal API (
term_sendkeys,term_list) provides sufficient infrastructure for a complete REPL workflow without external dependencies. - The two-stage submission pattern (write to file, then source) is more robust than sending text directly through
term_sendkeysfor multi-line selections. - Scoping mappings to specific filetypes via autocommand groups prevents key conflicts in non-R buffers.
- A plugin under 150 lines can cover the vast majority of daily R interaction needs.
6.4.2 Technical Skills
getpos("'<")andgetpos("'>")extract the exact positions of visual selection boundaries.expand("<cword>")captures the word under the cursor, enabling generic inspection commands.autocmd FileTypeis the correct mechanism for filetype-scoped mappings;ftplugin/directories are an alternative but require more file management.- The
\|separator chains Vim commands on a single autocommand line, which is necessary for multi-step visual mode operations.
6.4.3 Gotchas and Pitfalls
- Visual mode mappings execute once per line by default unless the mapping explicitly operates on the selection as a unit.
term_list()returns terminals in creation order, not in order of last use; the first terminal may not be the intended one.- The
<C-r>%expansion in mappings inserts the current filename, but fails if the filename contains spaces. nohafter search-based navigation is necessary to avoid persistent highlighting that obscures the editing buffer.
6.5 Limitations
- The plugin targets Vim 8+ only; Neovim users would need to adapt the terminal API calls to Neovim’s
jobsend()and related functions. - Only the first terminal buffer receives code submissions; multiple R sessions are not supported.
- The
source_visualtemporary file approach leaves artefacts in the working directory. - No support for sending code to non-R interpreters (Python, Julia, etc.) without modification.
- The plugin does not provide R object completion, help lookup, or any of the advanced features that Nvim-R offers.
- Chunk navigation relies on markdown code fences and will not work in plain
.Rfiles.
6.6 Opportunities for Improvement
- Add a function to identify the R terminal specifically (by checking the terminal command) rather than relying on
term_list()[0]. - Use
tempname()instead of a fixed filename for the temporary source file, preventing conflicts in multi-instance Vim sessions. - Extend the autocommand group to support Python and Julia filetypes with appropriate interpreter commands.
- Add a function to display R help pages in a Vim buffer (e.g.,
<localleader>?on a function name). - Implement a chunk execution function that automatically advances to the next chunk after submission, matching the RStudio workflow.
- Package the plugin as a proper Vim package with documentation in
doc/for:helpintegration.
7 Wrapping Up
Writing a Vim plugin for REPL interaction proved to teach more about Vim’s terminal API than months of using other developers’ plugins. The result (rgt-R.vim) is under 150 lines, has no external dependencies, and handles the core workflow of sending R code from an editing buffer to a running terminal session.
What this project made clear is that minimalism in tooling is undervalued. The established R-Vim plugins are powerful, but their complexity creates a barrier to understanding and customisation. A small, readable plugin that one has written is easier to debug, extend, and teach from than a large plugin maintained by someone else.
Vim users working in R who find the existing plugins more complex than needed are encouraged to try writing their own. The terminal API is well-documented, and a working plugin can be built in an afternoon.
In conclusion, four points merit emphasis. First, Vim’s term_sendkeys() and term_list() provide the complete infrastructure for REPL interaction without any external dependencies. Second, the two-stage submission pattern (write to file, then source) handles multi-line selections robustly, avoiding the timing issues of direct text injection. Third, autocommand groups scope mappings to relevant filetypes without affecting other buffers, keeping the plugin non-intrusive. Fourth, a minimal plugin under 150 lines covers 90% of daily R interaction needs, which is a favourable ratio of complexity to utility.
8 See Also
Related posts:
- Configure the Command Line for Data Science: Terminal and shell configuration for development
Key resources:
- Vim Terminal API: Official documentation for terminal functions
- Chris Toomey’s Vim Talk: Inspiration for the plugin approach
- Nvim-R: The full-featured alternative for Neovim
- vim-slime: The tmux-based alternative
- Learn Vimscript the Hard Way: Comprehensive guide to writing Vim plugins
9 Reproducibility
The complete plugin source is presented inline above. To install:
- Copy the code into
~/.vim/plugin/rgt-R.vim. - Ensure your
localleaderis set (e.g.,let maplocalleader = ","in.vimrc). - Open an R, Rmd, or Qmd file in Vim.
- Press
<localleader>rto open an R terminal. - Press
<CR>on any line to submit it.
Project files:
simplevimplugin/
  analysis/report/index.qmd  (this post)
  plugin/rgt-R.vim            (the plugin)
  analysis/media/images/      (hero, ambiance)
10 Let’s Connect
- GitHub: rgt47
- Twitter/X: @rgt47
- LinkedIn: Ronald Glenn Thomas
- Email: rgtlab.org/contact
I would enjoy hearing from readers who:
- Spot an error or a better approach to any of the code in this post.
- Have suggestions for topics to cover.
- Want to discuss R programming, data science, or reproducible research.
- Have questions about anything in this tutorial.
- Simply want to say hello and connect.