Producing R Coding Videos: OBS Screencasts and Narrated Slide Decks
setup
obs
youtube
screencast
video-production
ffmpeg
whisper
r
reproducibility
A reproducible, hands-on pipeline for producing R data analysis videos two ways: live OBS Studio screencasts and edited, narrated slide decks assembled with sox, ffmpeg, and Whisper. Includes installation, a worked five-minute Palmer Penguins example for each method, and a full YouTube publishing walkthrough.
Author
Ronald G. Thomas
Published
May 2, 2026
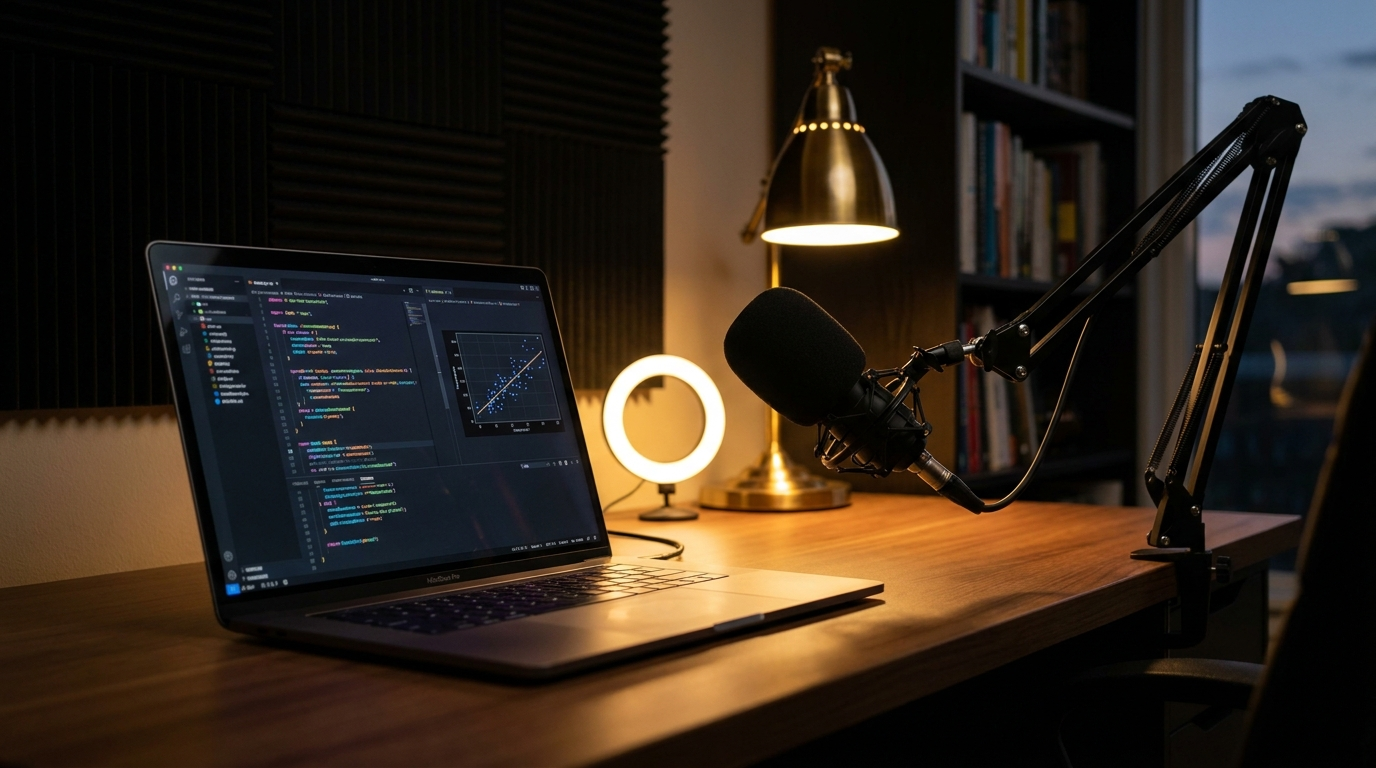
A recording desk set up for a live R screencast: microphone, ring light, and a laptop screen already showing the code editor.
A short screencast captures the small decisions a written report leaves out.
Introduction
I did not appreciate how much a good screencast teaches until a colleague sent me a five-minute video of an analysis I had read about in a paper a week earlier. The paper had described the model, the data, and the result. The screencast showed the analyst pause over a missing value, change a plot scale mid-thought, and read aloud the output of summary(fit). That brief exposure to the analyst’s working memory taught me more about the analysis than the paper had.
I tried a few proprietary tools first, without much luck. What I eventually discovered was that the open source community already had a complete capture pipeline waiting: OBS Studio for recording, YouTube for distribution, and a small set of recording conventions to glue them together. The pipeline costs nothing, runs on macOS, Linux, and Windows, and produces files that any future viewer can play without an account.
We walk through that pipeline end to end. The post covers OBS installation, scene and audio configuration suitable for an R coding session, and a publication checklist for YouTube. It closes with a worked five-minute example using the Palmer Penguins dataset that mirrors the analytical structure of Palmer Penguins Part 1.
Motivations
Written reports describe the finished analysis but not the small decisions the analyst makes between keystrokes. A short screencast exposes those decisions.
Proprietary screencasting tools (Camtasia, ScreenFlow) cost between 100 and 300 dollars and lock recordings into vendor-specific project formats.
Live streaming an analysis to a small group of collaborators (a thesis advisor, a paper co-author, a study team) was awkward without a reproducible setup.
The R community has gravitated toward YouTube as the default home for asynchronous tutorials, but documentation of the recording workflow itself is scattered.
Not every analysis suits a live take. A polished, narrated slide deck with edited audio communicates a finished result better than a screencast, and a reproducible pipeline for building one belongs alongside the live-capture workflow rather than in a separate, undocumented pile of scripts.
Objectives
Install and configure OBS Studio on macOS or Linux with sensible defaults for R coding screencasts (1080p, 30 fps, hardware encoder).
Establish a three-scene template (code only, code with webcam, title card) and a two-source audio chain (microphone with noise suppression, optional system audio).
Produce a 30-second test recording, edit it with ffmpeg, and upload it to YouTube as an unlisted draft with appropriate metadata.
Walk through a complete five-minute live R coding session based on the Palmer Penguins dataset, ready to record on a second take.
Build the same Palmer Penguins result a second way, as an edited, narrated slide deck assembled entirely from the command line with sox, ffmpeg, and Whisper, and publish it to YouTube alongside the live-capture version.
Two Ways to Produce an R Coding Video
This post covers two production methods and a shared publishing step, not one method with variations. They solve different problems and are not interchangeable.
Method One: live capture with OBS Studio. The analyst codes on camera in real time. The value is authenticity: viewers see hesitation, false starts, and the analyst’s actual working process, which a script cannot fake. The cost is that mistakes are either kept (in the spirit of a live take) or force a full re-record, since there is no timeline to edit.
Method Two: a narrated slide deck assembled from a script. The analyst writes a short script, renders the key plots and model output as static images, records narration for each slide separately, and assembles the result with command-line tools. The value is polish and reproducibility: a typo in the narration only requires re-recording one slide’s audio, and the whole build can be scripted end to end. The cost is that it looks and feels like a produced video rather than a live session, which is a poor fit for teaching debugging or exploratory analysis.
Both methods end at the same place: a rendered mp4, a caption vtt file, a thumbnail, and a YouTube upload with the same metadata conventions. Steps 1 through 8 below cover Method One. Steps 9 through 16 cover Method Two. Step 17, the YouTube publishing walkthrough, applies to whichever video is being uploaded.
Microphone, ring light, notebook, and coffee: the script and narration notes for either method are drafted with the same low-tech tools as everything else in this pipeline.
What Is OBS Studio?
OBS Studio (Open Broadcaster Software) is a free, cross-platform video recording and live streaming application released under the GNU General Public License version 2. It plays the same role for video that ffmpeg plays for command-line transcoding: a deeply scriptable, deeply configurable workhorse that the rest of the open source ecosystem builds on. Here is a concrete example. Every academic conference I have attended in the past two years that recorded talks for asynchronous viewing used OBS, either directly by the AV team or via a downstream tool that wraps it.
Prerequisites
Operating system. macOS 12 or later, Ubuntu 22.04 or later, or equivalent. Windows 10/11 also works but is not the focus of this post.
Hardware. A laptop or desktop from the past five years. Hardware H.264 encoding (Apple VT on macOS, NVENC on NVIDIA GPUs) reduces CPU load substantially during recording.
Microphone. Any USB or 3.5mm microphone. Built-in laptop microphones produce listenable but distinctly amateur audio.
Prior knowledge. Basic shell command experience and familiarity with the R session one intends to record.
Disk space. Roughly 50 megabytes per minute of recorded video at the recommended quality settings.
Additional tools for Method Two.ffmpeg, sox, ImageMagick, and OpenAI Whisper (installed below in Step 9). A slide editor is also needed; this post uses LibreOffice Impress because it is free, scriptable, and exports directly to PNG.
Step by Step
Method One: Live Capture with OBS Studio
Steps 1 through 8 set up and use OBS Studio for a real-time, on-camera recording of an R session.
Step 1: Install OBS Studio
On macOS:
brew install --cask obs
On Debian or Ubuntu:
sudo apt install obs-studio
Launch OBS once and accept the auto-configuration wizard’s defaults. The wizard probes the system to choose sensible recording resolution and encoder settings.
Verification:
obs--version
A successful install prints the version string (30.x as of 2026-05).
Step 2: Configure Scenes and Sources
A coding screencast typically needs three scenes:
Code only. A single Display Capture or Window Capture source for the editor or terminal. Useful for the bulk of the recording.
Code with webcam. The same capture source plus a small Video Capture Device overlay for the presenter, anchored to a corner.
Title card. A static image source for the opening and closing seconds of the video.
Window Capture is preferred over Display Capture when only a single application needs to be visible: it ignores notification banners, desktop clutter, and accidental tab switches.
Step 3: Audio Routing
Two audio sources matter for a coding screencast: microphone and (optionally) system sound. Add both as separate sources so they can be mixed independently.
For a USB microphone, set the input gain so the audio meter peaks around -12 dB during normal speech. Apply the Noise Suppression filter (RNNoise) and a Compressor filter to even out volume across sentences.
Step 4: Recording Format
In Settings > Output > Recording:
Recording Path. A dedicated ~/screencasts/ directory.
Recording Format.mkv (resilient to crashes; remux to mp4 afterward).
Encoder. Hardware encoder if available (Apple VT H.264 on macOS, NVENC on Linux with NVIDIA GPU).
Rate Control. CQP at quality 18 to 22.
Set frame rate to 30 fps and base resolution to 1920x1080. Higher frame rates are unnecessary for coding content and inflate file size.
Step 5: Practice Run
Record a 30-second test that exercises every scene transition and confirms the audio levels. Play the result back at full screen on a different device. Common issues caught at this stage include muted microphone input, font sizes too small to read at video compression, and a busy desktop background visible behind a window-captured editor.
Audio interface mid-recording, levels lit, a scene panel glowing out of focus behind it: the moment a take is actually rolling.
Step 6: The Five-Minute Analysis
The recorded analysis itself follows a strict template: load, glimpse, plot, model, summary. The full code for the worked example is below; during the screencast each block is typed and explained in real time.
A brief comment on the dataset acknowledges its provenance (Palmer Station, Antarctica; collected by Dr. Kristen Gorman) and previews the question: how well does flipper length predict body mass?
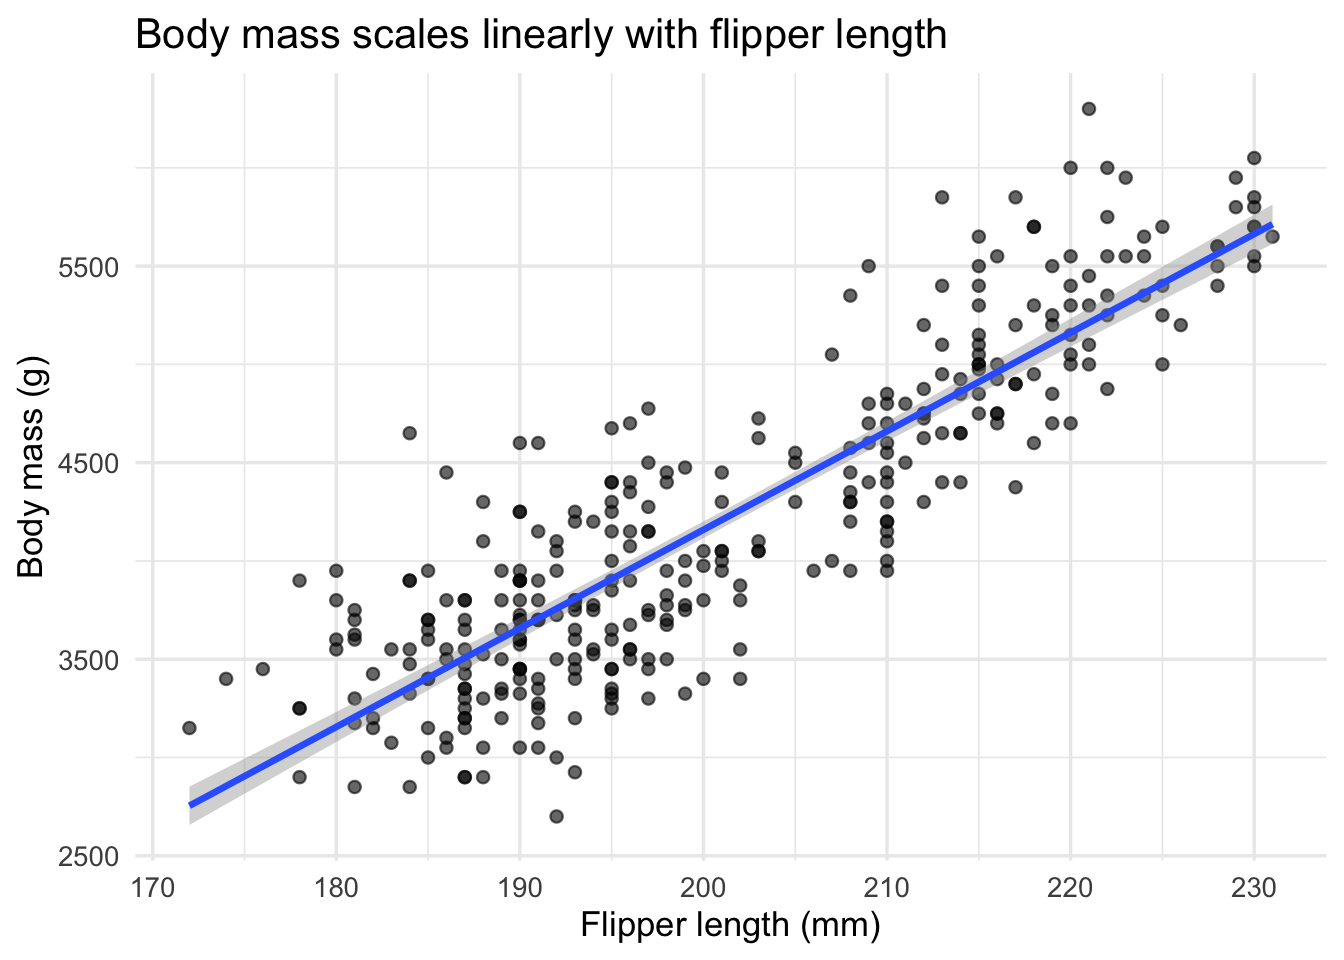
ggplot( penguins_clean,aes(x = flipper_length_mm, y = body_mass_g)) +geom_point(alpha =0.6) +geom_smooth(method ='lm', se =TRUE) +labs(x ='Flipper length (mm)',y ='Body mass (g)',title ='Body mass scales linearly with flipper length' ) +theme_minimal(base_size =13)
The visual establishes the linear relationship before the model is fit, which keeps the viewer oriented.
fit <-lm(body_mass_g ~ flipper_length_mm,data = penguins_clean)summary(fit)
Call:
lm(formula = body_mass_g ~ flipper_length_mm, data = penguins_clean)

Residuals:
     Min       1Q   Median       3Q      Max
-1057.33  -259.79   -12.24   242.97  1293.89

Coefficients:
                  Estimate Std. Error t value Pr(>|t|)
(Intercept)       -5872.09     310.29  -18.93   <2e-16 ***
flipper_length_mm    50.15       1.54   32.56   <2e-16 ***
---
Signif. codes:  0 '***' 0.001 '**' 0.01 '*' 0.05 '.' 0.1 ' ' 1

Residual standard error: 393.3 on 331 degrees of freedom
Multiple R-squared:  0.7621,    Adjusted R-squared:  0.7614
F-statistic:  1060 on 1 and 331 DF,  p-value: < 2.2e-16
A flipper length increase of one millimeter is associated with roughly a 50 gram increase in body mass. R-squared is approximately 0.76, which is striking for a single predictor and provides a natural cliffhanger for a follow-up post that introduces species as a covariate (see Palmer Penguins Part 1).
The screencast closes with a one-sentence summary and a verbal pointer to the written post that contains the full analysis.
Upload via the YouTube Studio web interface. Recommended metadata fields:
Title. Mirror the blog post title.
Description. Link to the blog post and to the GitHub repository.
Tags.r, data analysis, screencast, plus dataset tags.
Chapters. Add timestamp markers in the description so viewers can jump to the modeling section.
Step 8: Embed in the Blog Post
Quarto embeds YouTube videos with a single shortcode:
The video should appear early in the post, ideally just after the introduction, so visitors can choose to watch or read.
Default Recording Hotkeys
Action
macOS shortcut
Linux shortcut
Start / stop record
not bound by default
not bound by default
Pause record
not bound by default
not bound by default
Switch scene
configurable per scene
configurable per scene
Mute microphone
configurable
configurable
Bind these in Settings > Hotkeys before the first real recording. Unbound defaults catch most beginners off guard.
Method Two: A Narrated Slide Deck, Assembled from the Command Line
Steps 9 through 16 build a second, produced version of the same Palmer Penguins result: an eight-slide, narrated video assembled entirely with command-line tools rather than a screen recorder. The pipeline below is adapted from the one used to produce the Palmer Penguins Part 1 video, generalized so it applies to any short R result.
Whisper’s first run downloads a model file (the base model used below is about 140 megabytes); do this once, before a recording session, rather than mid-production.
Step 10: Write the Script
A slide deck is scripted before it is built, unlike a live take, which is improvised against an outline. Five minutes of narration is roughly 650 to 750 words at a comfortable speaking pace (130 to 150 words per minute). Split the script into one paragraph per slide so each paragraph becomes one narration take:
Title. State the question: does flipper length predict body mass in the Palmer Penguins?
Data. Introduce the 333-observation, three-species dataset and its provenance (Palmer Station, Antarctica; Dr. Kristen Gorman).
Visual relationship. Describe the scatter plot before the model is fit, so the viewer is oriented to expect a positive, roughly linear trend.
Model. Fit lm(body_mass_g ~ flipper_length_mm) and state the coefficient and R-squared in plain language.
Interpretation. One millimeter of flipper length corresponds to roughly 50 grams of body mass; R-squared near 0.76 is strong for a single predictor.
Limitation. Note the residual clustering by species as a cliffhanger for a multiple-regression follow-up.
Takeaway. One sentence restating the finding.
Close. Point to the written post and the code repository.
Keep each paragraph to 60 to 90 words. A paragraph that runs long either splits into two slides or gets cut; do not solve pacing problems by talking faster during recording.
Step 11: Export Slide Assets from R
Render the plot and the model summary as static assets the slide deck will embed. This runs as a standalone script, separate from the report itself, so the file paths below assume a working directory of video_production/ alongside slides/ and audio/ subdirectories:
library(palmerpenguins)library(ggplot2)library(dplyr)penguins_clean <- penguins |> tidyr::drop_na()p_flipper_mass <-ggplot( penguins_clean,aes(x = flipper_length_mm, y = body_mass_g)) +geom_point(alpha =0.6) +geom_smooth(method ="lm", se =TRUE) +labs(x ="Flipper length (mm)",y ="Body mass (g)",title ="Body mass scales linearly with flipper length" ) +theme_minimal(base_size =20)ggsave("slides/assets/flipper_mass_scatter.png", p_flipper_mass,width =10, height =5.6, dpi =200)fit <-lm(body_mass_g ~ flipper_length_mm, data = penguins_clean)capture.output(summary(fit), file ="slides/assets/model_summary.txt")
Use base_size = 20 or larger for any plot bound for a slide; text sized for a printed figure reads as illegible once compressed into a 1920x1080 video frame.
Step 12: Build the Slide Deck
Build the eight slides in LibreOffice Impress (File > New > Presentation, 16:9), one slide per script paragraph from Step 10. Import flipper_mass_scatter.png on the visual-relationship slide and render model_summary.txt as a monospace text box on the model slide. Keep body text under 40 words per slide; the narration carries the explanation, and a slide crowded with text competes with the narrator for the viewer’s attention. Export the finished deck as PNG, one file per slide:
File > Export As > Export as Images... > slides/exported/slide-01.png
For a build that needs to be reproducible or repeated across many posts, generate the deck programmatically instead of by hand. Use the odfpy Python package to write slide XML directly (title, image frame, and text box per slide), then script the PNG export step with soffice --headless --convert-to png. This trades a one-time scripting cost for the ability to regenerate every slide from source data without reopening Impress.
Step 13: Record Narration Per Slide
Record each script paragraph as a separate WAV file in Audacity (Tracks > Add New > Mono Track, then File > Export > Export Audio), saved as audio/slide-01_raw.wav through audio/slide-08_raw.wav. Recording one slide at a time, rather than the whole script in one take, means a flubbed line only costs a re-record of that slide, not the whole narration. Read at a conversational pace with a half-second pause at the start and end of each take; the pause gives the fade filters in Step 14 something to work with.
Step 14: Process Audio with sox
Normalize level, reduce room noise, and add short fades on every slide’s narration:
cd audiofor f in slide-*_raw.wav;dobase="${f%_raw.wav}"sox"$f"-n trim 0 0.3 noiseprof "${base}_noise.prof"sox"$f""${base}_clean.wav" noisered "${base}_noise.prof" 0.21sox"${base}_clean.wav""${base}_final.wav" gain -n-1 fade t 0.3 0 0.3done
noiseprof samples the first 0.3 seconds of each take as a noise fingerprint. This is why the half-second pause from Step 13 matters: without silence at the start, noiseprof fingerprints speech instead of room noise, and the noisered pass distorts the voice.
Step 15: Assemble the Video with ffmpeg
Build a silent slideshow, an assembled narration track, and combine them, all from the video_production/ directory:
# 1. List each slide image with its narration's duration.for f in audio/slide-*_final.wav;doffprobe-v error -show_entries format=duration \-of default=noprint_wrappers=1:nokey=1 "$f"done# Use these durations to build slides.txt:cat> slides.txt << 'EOF'file 'slides/exported/slide-01.png'duration 8file 'slides/exported/slide-02.png'duration 12file 'slides/exported/slide-03.png'duration 14file 'slides/exported/slide-04.png'duration 16file 'slides/exported/slide-05.png'duration 14file 'slides/exported/slide-06.png'duration 10file 'slides/exported/slide-07.png'duration 8file 'slides/exported/slide-08.png'duration 8EOF# 2. Render the slideshow (no audio yet).ffmpeg-f concat -i slides.txt \-vf"scale=1920:1080,format=yuv420p"\-c:v libx264 -r 30 slides_only.mp4# 3. Concatenate the eight narration files into one track.ls-1 audio/slide-*_final.wav |sort|sed"s/^/file '/;s/$/'/"\> audio/audio_list.txtffmpeg-f concat -safe 0 -i audio/audio_list.txt \-c:a pcm_s16le audio/narration.wav# 4. Merge video and narration, then add a one-second fade at each end.ffmpeg-i slides_only.mp4 -i audio/narration.wav \-c:v libx264 -c:a aac -b:a 192k \-map 0:v:0 -map 1:a:0 video_draft.mp4DURATION=$(ffprobe-v error -show_entries format=duration \-of default=noprint_wrappers=1:nokey=1 video_draft.mp4 |cut-d.-f1)FADE_OUT=$((DURATION-1))ffmpeg-i video_draft.mp4 \-vf"fade=t=in:st=0:d=1,fade=t=out:st=${FADE_OUT}:d=1"\-af"afade=t=in:st=0:d=0.5,afade=t=out:st=${FADE_OUT}.5:d=0.5"\-c:v libx264 -c:a aac \ Palmer_Penguins_Slides_Final.mp4
The per-slide duration values in slides.txt must match (or slightly exceed) each slide’s narration length from step 1, or the image will change before the sentence describing it finishes.
Step 16: Generate Captions and a Thumbnail
Whisper transcribes the finished narration track directly into a .vtt caption file:
whisper Palmer_Penguins_Slides_Final.mp4 \--model base --output_format vtt --output_dir .
Read the generated captions once before uploading. Whisper’s base model is fast but occasionally mis-hears domain vocabulary (it transcribed ‘flipper length’ as ‘flipper lengths’ in one early test here); statistical terms and dataset names are worth a manual pass.
Build a 1280x720 thumbnail from the title slide:
convert slides/exported/slide-01.png -resize 1280x720^ \-gravity center -extent 1280x720 \ thumbnail.png
Step 17: Publish to YouTube, Step by Step
This step applies to either method’s finished mp4. Neither the OBS export nor the ffmpeg build in Step 15 uploads automatically. The YouTube Data API supports scripted uploads, but this pipeline deliberately keeps a human in the loop for the title, description, and thumbnail, all of which benefit from a final look before they go public.
Sign in to YouTube Studio at studio.youtube.com with the channel’s account.
Start the upload. Click Create (top right) then Upload videos, and select clipped.mp4 (Method One, from Step 7) or Palmer_Penguins_Slides_Final.mp4 (Method Two, from Step 15).
Fill in Details.
Title.Palmer Penguins: Does Flipper Length Predict Body Mass? (R Analysis)
Description. Lead with the question, list a few timestamp chapters, and close with links to the written post and code repository:
Does flipper length predict body mass in the Palmer Penguins?
A five-minute R walkthrough: load, visualize, fit, interpret.

0:00 The question
0:20 The data (333 penguins, 3 species)
1:10 Visualizing the relationship
2:20 Fitting the model
3:30 Interpreting the coefficient and R-squared
4:20 What the model misses (species clustering)
4:50 Takeaway

Written post: [blog link]
Code: [GitHub link]
Dataset: palmerpenguins R package

#RStats #DataScience #Regression
Thumbnail. Upload thumbnail.png from Step 16 (Method Two) or a still frame exported from the OBS recording (Method One): ffmpeg -i clipped.mp4 -ss 00:00:05 -frames:v 1 thumbnail.png.
Playlist. Add to the channel’s R analysis playlist, if one exists, so the video surfaces alongside related content.
Audience. Mark ‘not made for kids’ unless the channel is specifically educational content for children.
Video elements. Skip end screens and cards for a first upload; both require existing videos or subscriber thresholds this pipeline does not depend on.
Checks. YouTube runs an automated copyright check. For a Palmer Penguins walkthrough this reliably passes; a video with licensed background music (see the polish notes in Step 6 of the live-capture method) may take longer.
Captions. Under Subtitles, upload the .vtt file: from Whisper (Method Two, Step 16) or generated the same way from the OBS export’s audio track (Method One). Do not rely on YouTube’s automatic captions alone; they are usually worse than a Whisper pass corrected by hand.
Visibility. Publish as Unlisted first. Watch the unlisted link back on a phone and a laptop, at typical viewing volume, to catch audio and caption sync issues before anyone else sees it.
Go public. Once the unlisted check is clean, change visibility to Public (or Scheduled, if coordinating with the blog post’s publish date) and copy the resulting URL into the blog post’s video embed from Step 8.
Comparing the Two Methods
Property
Method One (live capture)
Method Two (slide deck)
Setup time
Lower (OBS install only)
Higher (full toolchain)
Production time (5 min video)
30-60 minutes
4-5 hours
Fixing one bad sentence
Re-record the whole take
Re-record one slide’s audio
Best for
Live coding, debugging, teaching process
Finished results, polished explainers
Editing control
Minimal (cut points only)
Full (per-slide timing, captions, thumbnail)
Things to Watch Out For
The following gotchas have all caught me at least once. Each lists the symptom and the fix.
Display Capture shows a black rectangle on macOS. Symptom: the captured area is uniformly black even though the screen has content. Fix: grant OBS Screen Recording permission in System Settings > Privacy & Security > Screen Recording, then quit and relaunch OBS. The permission request only appears the first time; if it was dismissed, it must be granted manually.
Audio is silent in the recording but the meter shows activity. Symptom: the OBS audio meter moves during speech, but playback is silent. Fix: check that the microphone source is not muted in the Audio Mixer panel (the speaker icon is hidden until hovered) and confirm the recording’s output channel mix in Settings > Audio > Advanced.
The recording stutters when the editor is in focus. Symptom: intermittent dropped frames during typing. Fix: switch from software (x264) to a hardware encoder, or reduce base resolution to 1280x720 if hardware encoding is unavailable. Coding content at 720p is still readable at typical viewing distances.
YouTube rejects the upload citing ‘invalid format’. Symptom: YouTube Studio displays a generic error after the upload finishes. Fix: most often the recording is in MKV. Remux to MP4 with ffmpeg -i recording.mkv -c copy recording.mp4. MKV is preferred during recording for crash resilience but YouTube prefers MP4.
Font in the recording is unreadable when played at small window sizes. Symptom: code is legible at full screen but pixelated in a 480-wide embed. Fix: increase the editor’s font size to 18 or 20 points before recording. What looks oversized in the editor compresses to comfortable reading size in the final video.
Webcam overlay is mirrored. Symptom: text on a notebook visible to the webcam appears reversed in the recording. Fix: right-click the Video Capture Device source, choose Transform > Flip Horizontal. OBS mirrors the preview by default to feel natural to the speaker but does not mirror the recorded output.
Recording fills the disk during a long session. Symptom: OBS silently stops recording after 20 to 30 minutes. Fix: at the recommended quality, every 10 minutes consumes roughly 500 megabytes. Confirm at least 5 gigabytes of free space before a long session, or switch to a more aggressive crf value (lower visual quality, smaller file).
sox noisered makes the narration sound underwater. Symptom: after Step 14, speech has a metallic or muffled quality. Fix: the noise-reduction strength (0.21 in the commands above) is too aggressive for the room. Lower it in steps of 0.05 and re-run; values below 0.15 usually leave audible hiss but preserve natural voice quality, which is the better trade for narration.
The ffmpeg concat demuxer silently drops slides. Symptom: slides_only.mp4 plays fewer than eight slides. Fix: the file paths in slides.txt are relative to the working directory ffmpeg is run from, not to the script’s location; run the command from inside video_production/, or use absolute paths.
Whisper mistranscribes statistical terms. Symptom: ‘R-squared’ becomes ‘are squared’, dataset or package names come out garbled. Fix: there is no flag that fixes this reliably; budget time to read the .vtt file once against the script from Step 10 and hand-correct domain vocabulary before uploading.
Uninstall / Rollback
To remove OBS Studio and its configuration entirely:
Both removals are reversible: a fresh install re-creates the configuration directory with default settings on first launch.
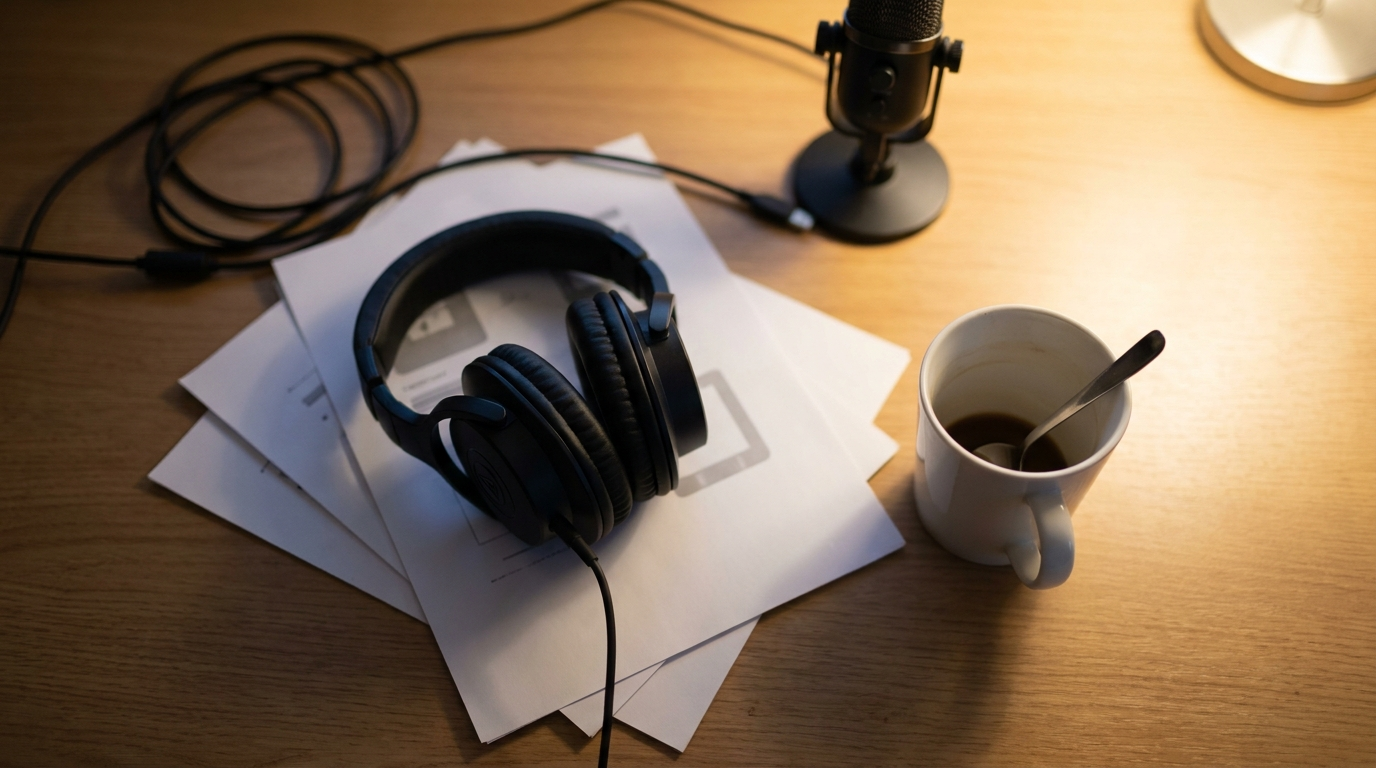
Headphones on the printed script, coffee half finished: the recording or the build script has finished, and only the edit and upload remain.
What Did We Learn?
Conceptual
A short screencast is a different teaching artifact from a written post; both have a place, and pairing them produces a richer resource than either alone.
Live capture and a produced slide deck are not competing solutions to the same problem; they serve different content. Choosing between them is a decision about what the video needs to show, not a matter of which tool is ‘better’.
The capture pipeline (recorder, encoder, hosting) can be assembled entirely from open source and free-tier components, with no long-term lock-in.
Recording forces a kind of editorial discipline that improves the written post too: vague paragraphs become obvious when read aloud.
Technical
Hardware encoders are essential on laptops; software encoding (x264) competes with R for CPU cycles and produces visible stuttering.
MKV during recording, MP4 for upload. The two-stage convention protects against crashes without sacrificing platform compatibility.
Audio quality matters more than video quality. Viewers tolerate 720p video far better than echo-prone or compressed audio.
Recording narration one slide at a time turns a single point of failure (the whole five-minute take) into eight independent, cheap retries. This is the main structural advantage of Method Two over Method One.
sox noiseprof needs true silence to fingerprint; a half-second pause at the start of every narration take is not a stylistic choice, it is a dependency of Step 14.
Gotchas
macOS screen-recording permission is granted per-application and silently fails closed. New OBS installs need a deliberate first-run trip through System Settings.
YouTube’s MP4 preference is documented but not enforced clearly in upload error messages.
Default OBS hotkeys are intentionally unset to avoid clashes; this feels broken until one realizes it.
Whisper transcription quality is good enough to save time but not good enough to skip review; domain vocabulary needs a human pass every time.
Limitations
Method Two does not include a full nonlinear video editor. For multi-cut tutorials, B-roll, or callouts beyond what ffmpeg filter chains can express, a timeline editor (Kdenlive, DaVinci Resolve, iMovie) is still the better tool; the command-line pipeline in this post is fixed-timeline slide assembly, not general video editing.
The Palmer Penguins worked example is a demonstration, not a template for clinical trial visualization. Audio narration would need different framing for sensitive data.
Live streaming via YouTube introduces 5 to 30 seconds of latency, which makes interactive Q&A clunky compared with a dedicated video conferencing tool.
Whisper captions need manual correction for statistical and package vocabulary; this post does not provide a scripted fix, only a review step.
Neither method’s YouTube publishing step is scripted end to end; the YouTube Data API supports automated uploads, but this pipeline keeps a human review of title, description, and thumbnail before publish, by design.
Opportunities for Improvement
Capture the OBS scene collection as a JSON file under analysis/configs/scene-collection.json so the configuration is reproducible across machines.
Script the audio chain (RNNoise + Compressor) using obs-websocket so the configuration can be applied programmatically.
Compare hardware encoder quality across Apple VT, NVENC, and QuickSync at matched bitrates.
Package Steps 9 through 16 as a single build_video.sh script, parameterized by a script file and a slide-asset directory, so a new Method Two video needs no manual command editing.
Replace the manual LibreOffice slide-building step in Step 12 with a scripted deck generator (odfpy), so slide content can be regenerated automatically whenever the underlying analysis changes.
Evaluate whisper.cpp as a faster, dependency-lighter alternative to the Python openai-whisper package used in Step 16.
Build a CI job that validates the scene collection JSON (Method One) and the slides.txt duration list (Method Two) before a recording session begins.
Wrapping Up
OBS Studio and a command-line slide-assembly pipeline, paired with YouTube and a shared publishing checklist, give R users two complete, open source paths to video content. Neither replaces the other. The investment in initial setup is modest for both, and pays off across many subsequent recordings: the same scenes and audio chain apply to every live take, and the same sox/ffmpeg/Whisper build applies to every slide deck.
The next step in this series is to record both versions of the Palmer Penguins analysis above, a live OBS take and a produced slide deck, and publish them alongside the written post. We will then compare viewer response between the two formats directly.
In conclusion, three points merit emphasis. First, the open source pipeline (OBS or ffmpeg, plus YouTube) is sufficient for publication-quality video of R analyses, with no proprietary tooling required, whether the content calls for a live take or a produced deck. Second, the choice between live capture and a slide deck is a decision about the content, not a preference; a debugging session belongs on camera live, a finished result belongs in an edited deck. Third, audio quality, font or text size, and a manual caption review are the details most often underestimated by first-time producers in either method, and correcting them before recording or uploading saves significant post-production effort.
Palmer Penguins Part 1 — the worked analysis used in both this post’s live-capture and slide-deck examples, and the source of the produced-video conventions Method Two generalizes.
ffmpeg documentation for trimming, remuxing, and the concat demuxer used in Steps 7 and 15.
SoX documentation for the noise-reduction and fade effects used in Step 14.
OpenAI Whisper for the caption generation used in Step 16.